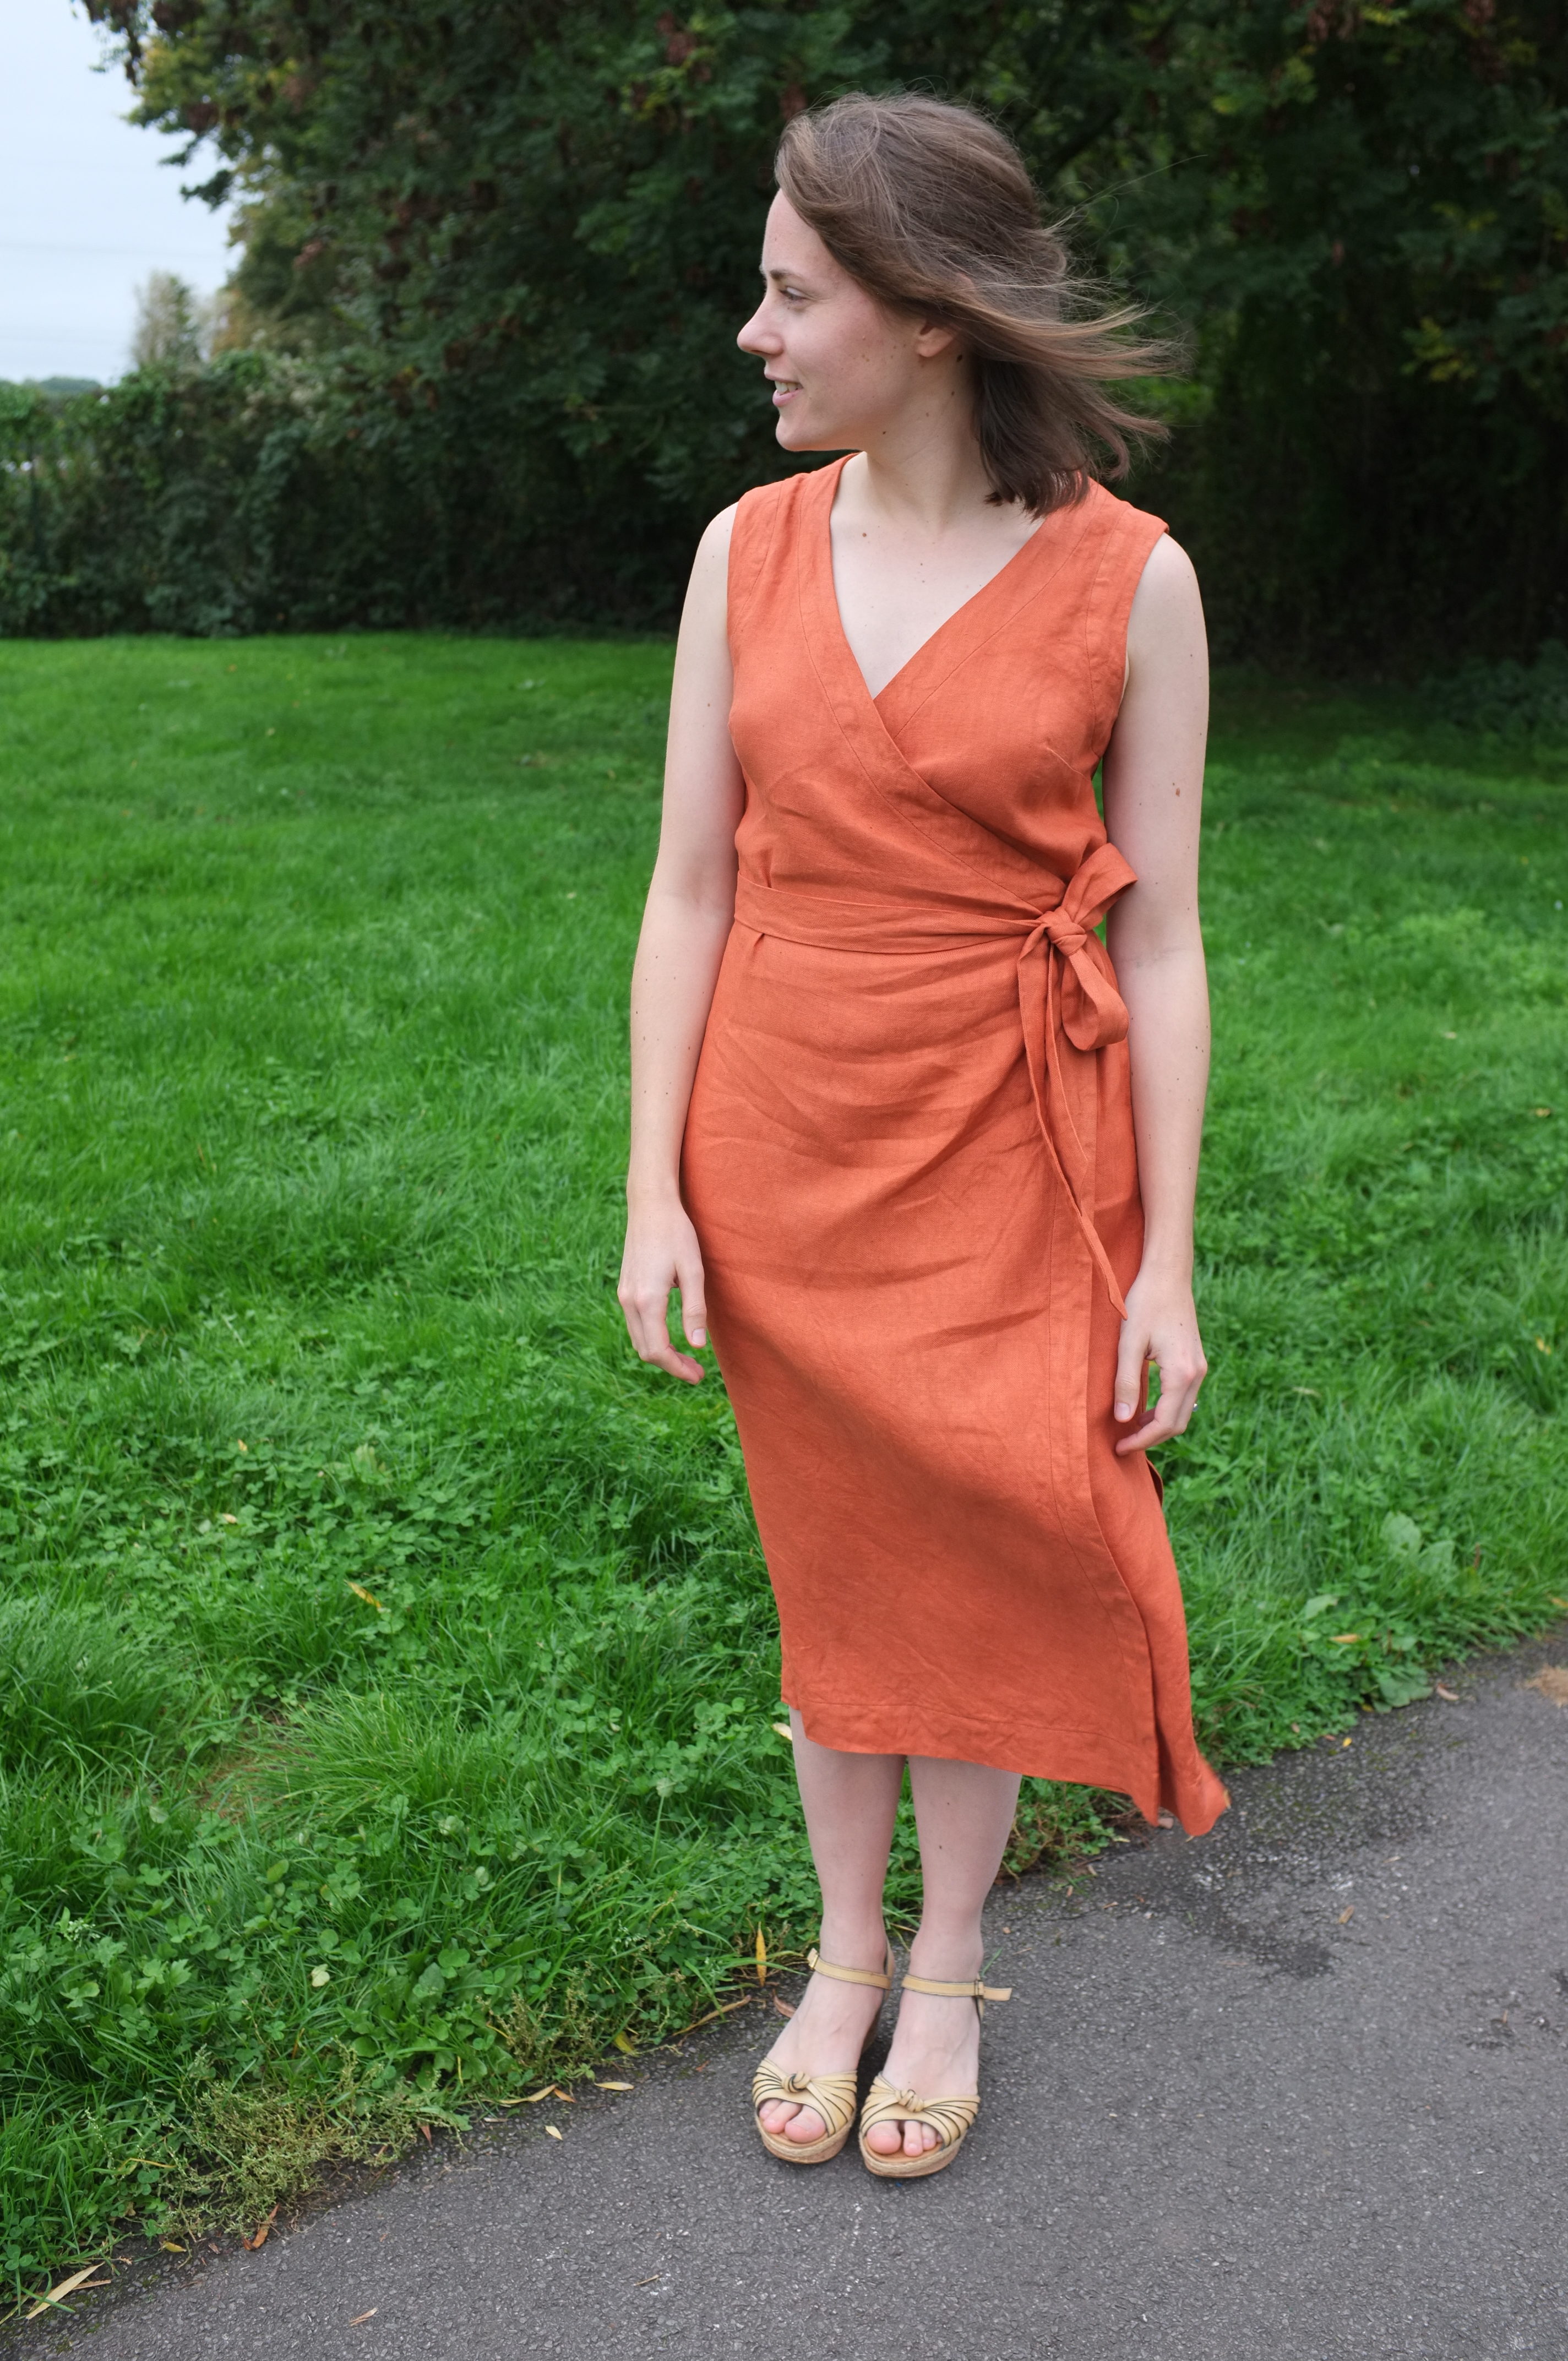
Hi everyone, I am hoping you are all heaving a lovely autumn. I just got back from a week in Germany for a wonderful wedding. For everyone who read my last post, yes I did wear the orange dress in the end. And while it definitely stood out amongst all the navy suits and dresses everyone else was wearing, I really enjoyed wearing something colourful. This orange is really growing on me. Back here in the UK we are having quite a gloomy weekend. It’s becoming more and more difficult to get good light for photos, so please ignore the slightly weird colours in the pictures below.
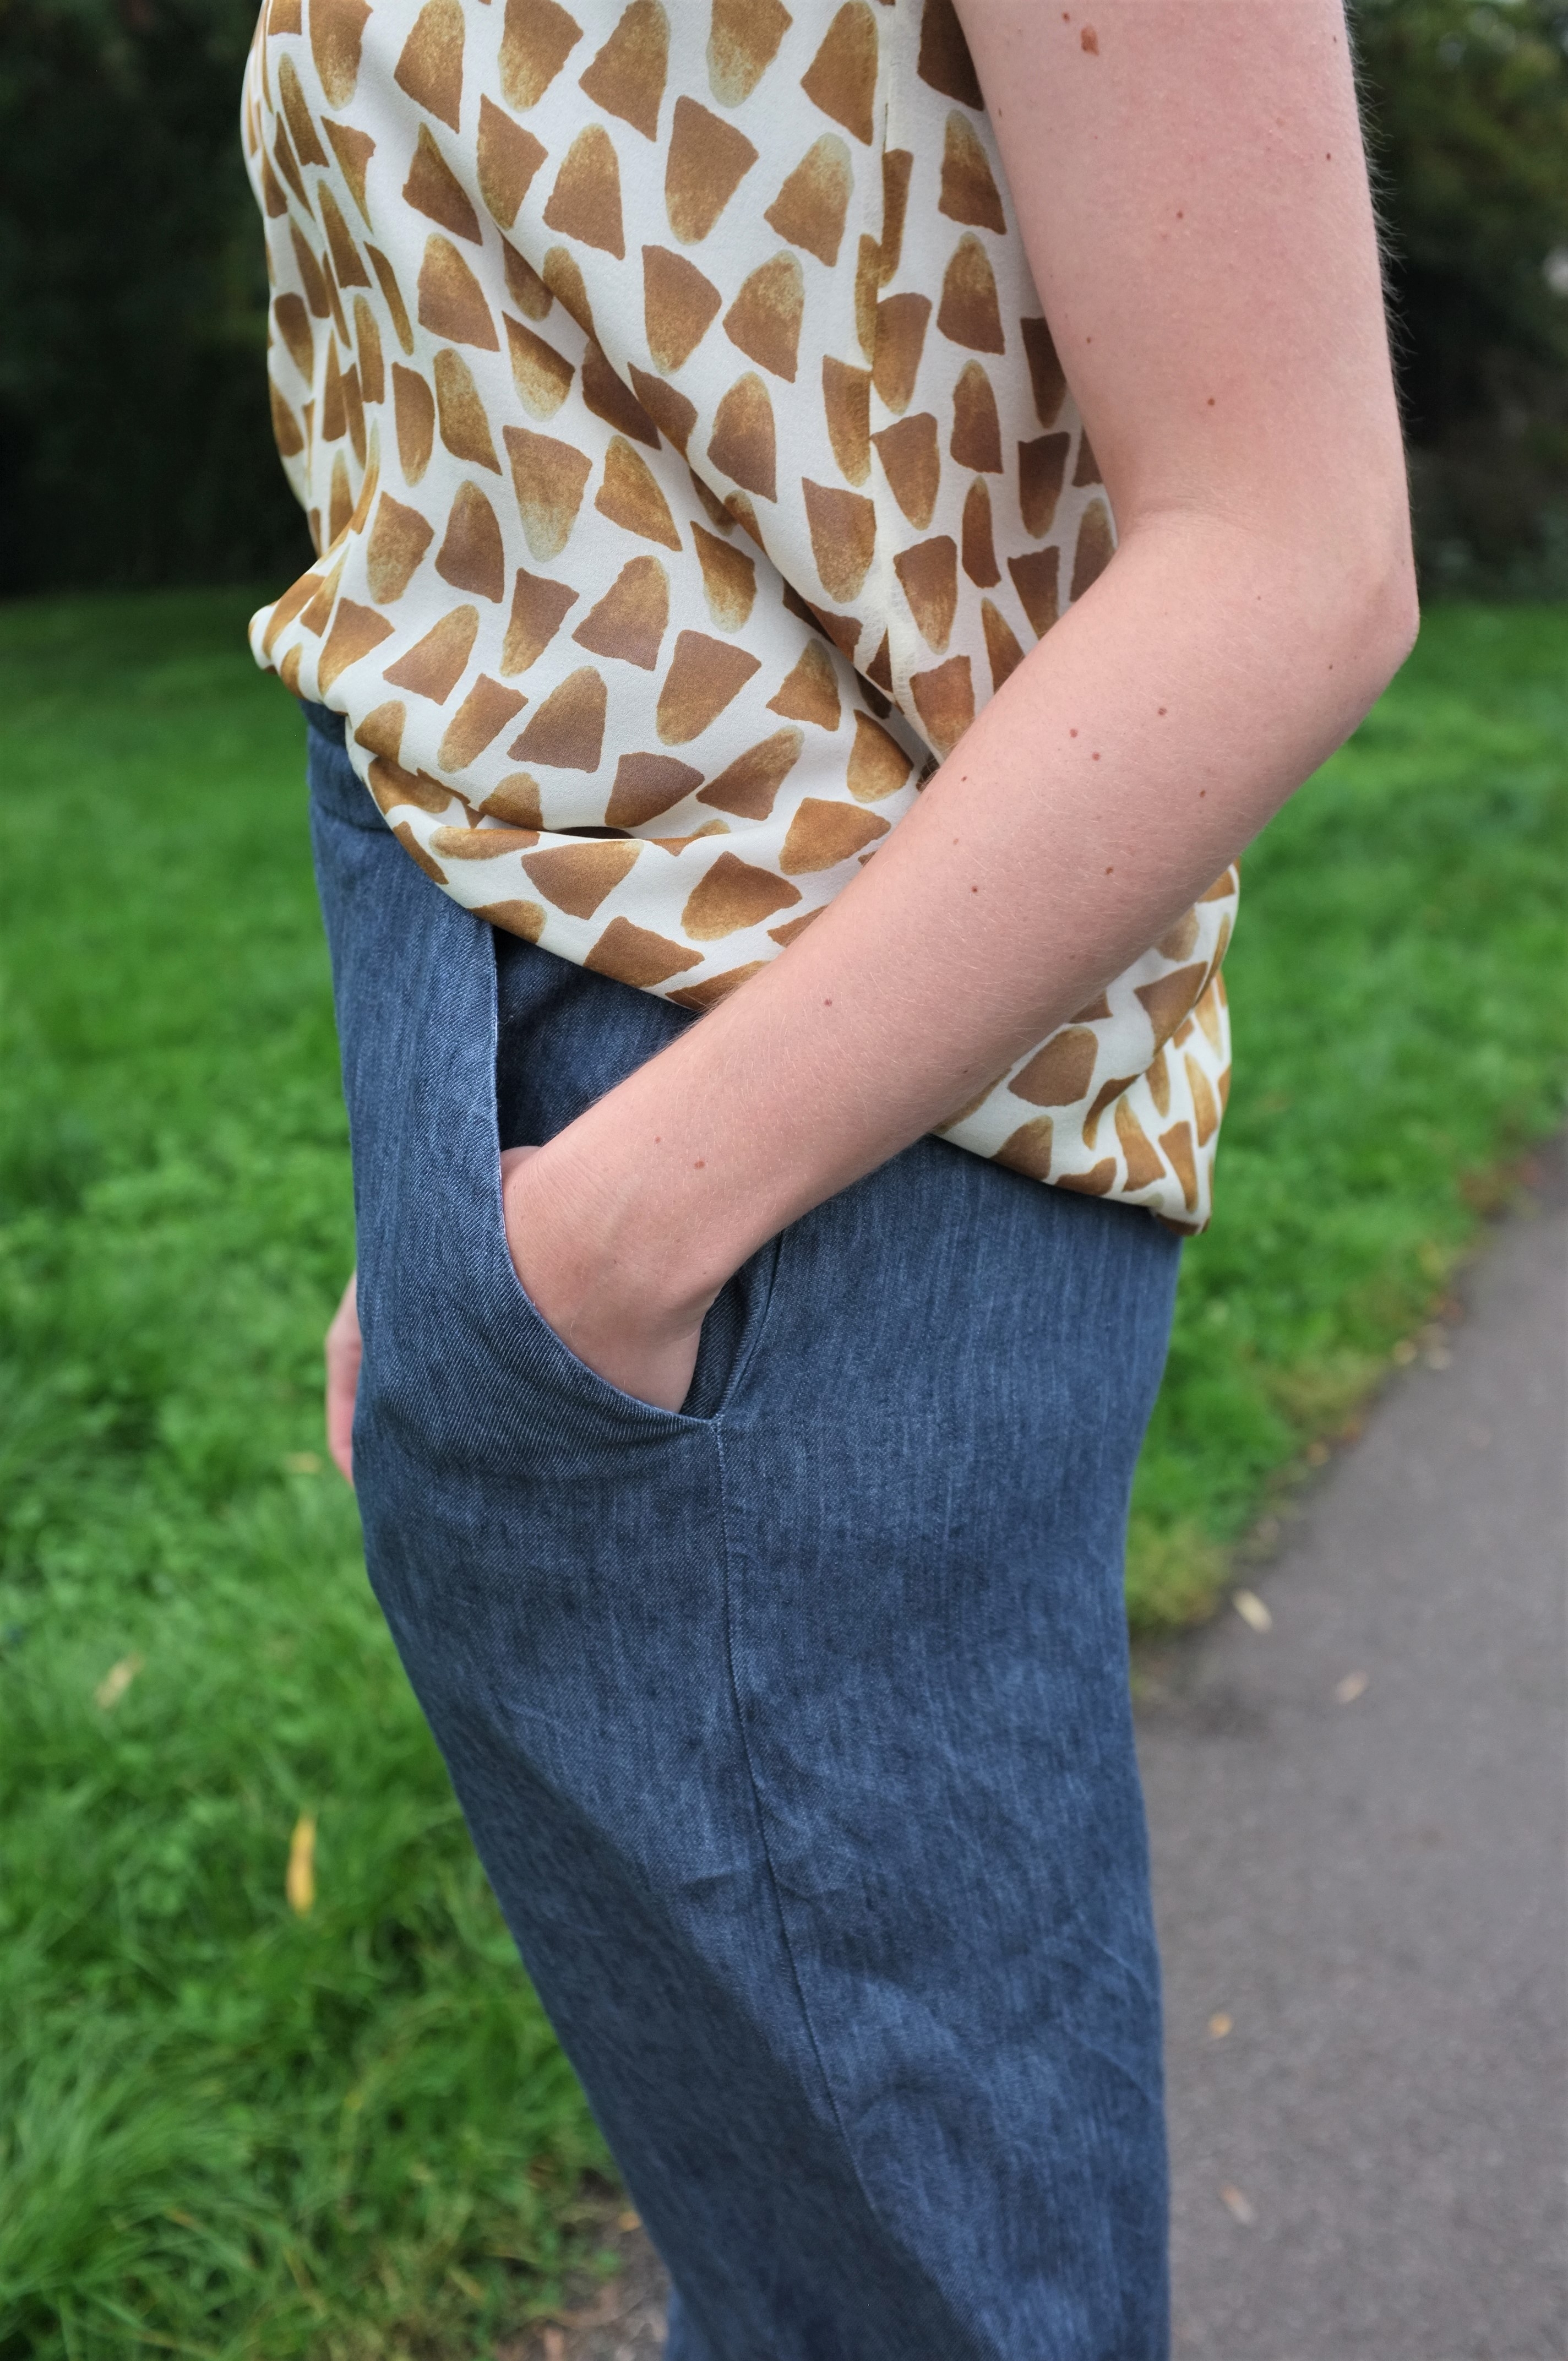
This week I have another great pairing of indie patterns for you: the Tessuti Ruby Top and the Megan Nielsen Flint in the culottes length. Both of these are patterns that you can’t really escape in the online sewing world and I was really intrigued to try them. Let’s start with the culottes. I made the Flint before in the shorts length and really liked them. It’s a pattern with lovely details and comes together really quickly. From the beginning though I knew I wanted to try the culotte length as well. While I have made a culotte jumpsuit before which I then converted to culotte trousers, I never really got a lot of wear out of them. Due to the shiny fabric, they might be just a little bit too fancy for everyday wear so I wanted to make a more casual version. The fabric, as so often, came from my favourite shop in my hometown and is a drapey linen chambray, perfect for this style of trousers. On my last pair I wasn’t 100% sold on the pleats at the front, so I followed the tutorial on Megan’s blog and converted them to a flat front. I love how sleek it looks! I also opted for the button closure this time, with both of the buttons facing to the inside to further add to the minimalist look. This now makes them a lot easier to pair with tops that are not tucked in.
In terms of sizing I did the same as with my Flint shorts. I made a size M, taking them in by roughly 3 cm in the waist. I followed the instructions for construction for everything except the crotch seam. You are told to clip the seam along the curve, but on my shorts I’m afraid the seam will tear due to the fraying fabric. So this time I serged the seam and topstitched it down for a mock flat felled seam. This feels a lot more secure. Just before hemming, I tried them on and decided to take 5 cm from the width of the leg; it felt like too much fabric for my taste. I hemmed the culottes at the length indicated in the pattern.
So what’s the verdict? My husband calls them my clown pants… And while I rarely listen to him for fashion advice, I do feel a little bit frumpy in them. I’m not sure if it’s the length (maybe they need to be a tad longer) or the amount of fabric in the leg that I’m just not used to. Also styling them for autumn is a little bit difficult. I might have to wait until next summer for the final verdict. The pattern itself is really lovely though.


 I’m probably not the only one who fell in love with this Liberty of London silk georgette Jellie when Papercut Patterns launched their latest collection and used it for their sample of the Kobe Top. It’s sold by The Fabric Store; ironically I couldn’t find it here in the UK. I had never ordered from them before and this fabric alone would not have justified getting this shipped from New Zealand. However, my husband only wears merino T-shirts and I decided to order some of their merino fabrics to make him some and this fabric slipped into the shopping basket.
The fabric is as beautiful in real life as on the screen but very delicate and sheer. I knew I would have to be careful with the construction and chose a simple pattern. I liked the idea of pairing this delicate silk with a modern shape to make sure I would get some wear out of it. After some deliberation I settled on the Tessuti Ruby Top. I like the cutaway armholes and the dart-less flared shape. To get the fit right, I made a quick muslin from cotton scraps. The fit was quite good, I only had to shorten the straps by 2 cm. For the final version I also shortened the hem a bit. I made it even shorter in the front so I would be able to wear it with high waisted skirts and trousers without having to tuck it in. In terms of construction I decided to add a centre back seam which would make constructing the keyhole easier.
Happy with the fit I moved on to the silk. I used spray starch against the shiftiness but it still was difficult to get everything straight. I knew pattern matching the back seam would almost be impossible, so I decided to ignore it and just mirror the two sides. I’m happy enough with how it looks. In the end I will never really see it… I fully lined it with some white viscose voile that I had in my stash. This gives it enough opacity and also helps with a clean finish on the inside. The seams are finished with my serger, which handled the silk really well. The hem is serged and then folded up once. Even though I let the top hang for a couple of days and was very careful when I evened out the hem, it still looks a little wonky. I’m trying to embrace it, but I might have to re-do it at some point. Other than that I really like how this turned out. It’s lovely to wear and adds a nice pop of yellow to my work wardrobe.


 Oh and this is how half of the pictures turned out from that photo shoot, it was a very windy day.